Showing posts with label Baking. Show all posts

Saturday, September 22, 2012

Crock Pot Applesauce

I think I have finally developed a schedule that I am happy with and can manage! GO ME! You know what that means?  Yeah, more posts. I am so in Autumn mode- pumpkins, leaves, football, and APPLES. When I was younger, my neighbor had brought over a tupperware full of home made applesauce. I am not an applesauce person AT ALL, but I will eat this by the gallons. Since then, I have tried to duplicate this recipe, for all I knew about it was it involved a crock pot or slow cooker. 

I know the basic ingredients are apples...obviously. Brown Sugar, lemon juice, water, and cinnamon. 
I usually triple this recipe because it is so easy to store in the fridge for a week or so. 
I usually use 10 apples and just use what we have in the house. This time, I was at B.J's and just picked up a bag of 10 Gala apples. Pell and core them. I don't get too picky about the skin because I like some skin in my applesauce, but its you're choice!

Throw them in the crock pot with a cup of water, a teaspoon of cinnamon, 2 tablespoons of lemon juice, and 1 cup packed brown sugar. Let this cook on low for 8-10 hours or high for 3-4 hours. 

When you're finished, it should look something like this: 
I know- It doesn't look very appetizing, but when it's fresh and warm- it's AMAZING. 
My mom and aunt like their apple sauce in chucks like this... so it's not really apple sauce.. 
I mash mine with a fork before I eat it and my aunt adds whipped cream. 

Hope you're enjoying the school year so far! Happy Baking :) 


Tuesday, August 28, 2012

Tie-Dye Cupcakes

I've been absent from the blog for about two weeks, and although it wasn't planned, it was a nice break.  Summer is ending and my junior year of college is starting in just 8 days! Someone please remind me when I turned old? I'm going camping with Kristopher's family for Labor Day weekend, and wanted to get a post up before I leave for 3 days. I am super excited about some upcoming posts this Fall and Winter- I've got a ton planned :)

These cupcakes are super easy and don't require much more than making regular boxed cupcakes- Just a box of food coloring!

Using your choice of vanilla cake mix, make as usual and evenly divide it into as many cups as colors you want in your cupcakes. I did the standard ROY G BIV. Add food coloring to each cup until it is the desired color you want. 
I ended up using more food coloring than what I had originally put in. 

Fill a cupcake tin with liners and drop by the spoonful into each liner. Don't mix the colors in the liners, just drop it in. You can use as much or as little as an colors you want. I tried to put at least a spoonful of each color into every cupcake. Bake according to the directions on the box of cupcakes, and you're finished! These are super easy and fun, and often overlooked or deemed as impossible. Ice them with your choice of icing. My aunt suggested making these for her daughter's birthday snack at school (probably because she doesn't feel like making them herself. lol) but I'm sure those 2nd graders will be surprised when they bite into them!


Monday, August 13, 2012

Banana Pudding Pie with Nilla Wafers

I feel like it's been weeks since I posted. Between training for a new job, being sick this past week, a concert, and tubing the Delaware River, I've been pretty busy. I've had, surprisingly, the chance to bake  somewhere in between. This was a last minute bake based off a sudden urge for banana. and pie.

This recipe is so super simple. With homemade Nilla Wafer crust, fresh vanilla pudding, chopped up bananas and fluffy meringue, it can't get any better. 
Crush up the wafers and add butter for crust. bake for 12 minutes. 

Layer with bananas and pour in the vanilla pudding filling. Add more bananas and a few left over wafers, and another layer of pudding. 

 Top with meringue and bake for an additional 15 minutes. 

Layers upon layers of goodness! 

*BE SURE TO SAVE BOTH PARTS OF THE EGG!!*
Banana Pudding Pie

  • (12-oz.) box vanilla wafers, divided
  • 1/2 cup butter, melted
  • large bananas, sliced

  • Vanilla Pudding Instructions
    • 3/4 cup sugar
    • 1/3 cup all-purpose flour
    • large eggs
    • egg yolks
    • 2 cups milk
    • 2 teaspoons vanilla extract
    • (Combine first 5 ingredients over low heat. Whisk until thick (Like chilled pudding). Turn off the heat and add vanilla. Use immediately.)
  • Meringue Ingredients:
  • egg whites
  • 1/2 cup sugar

  1. 1. Set aside 30 vanilla wafers; pulse remaining vanilla wafers in a food processor 8 to 10 times or until coarsely crushed. (Yield should be about 2 1/2 cups.) Stir together crushed vanilla wafers and butter until blended. Firmly press on bottom, up sides, and onto lip of a 9-inch pieplate.
  2. 2. Bake at 350° for 10 to 12 minutes or until lightly browned. Remove to a wire rack, and let cool 30 minutes or until completely cool.
  3. 3. Arrange banana slices evenly over bottom of crust. Prepare Vanilla Cream Filling, and spread half of hot filling over bananas; top with 20 vanilla wafers. Spread remaining hot filling over vanilla wafers. (Filling will be about 1/4 inch higher than top edge of crust.)
  4. 4. Beat egg whites at high speed with an electric mixer until foamy. Add sugar, 1 Tbsp. at a time, beating until stiff peaks form and sugar dissolves. Spread meringue evenly over hot filling, sealing the edges.
  5. 5. Bake at 350° for 10 to 12 minutes or until golden brown. Remove from oven, and let cool 1 hour on a wire rack or until completely cool. Coarsely crush remaining 10 vanilla wafers, and sprinkle evenly over top of pie. Chill 4 hours.


Wednesday, August 1, 2012

Nutella Croissants


These are a super quick, easy snack everyone will love! Like I say in every blog post, these went quick in my house. I am the oldest of 4 kids and 4 of my cousins live in the house next door. LOTS OF KIDS.
Nutella, Marshmellows and Reese Pieces?! Nothing can be better than that. All you need are:
1 roll of your favorite croissant rolls. I used Pillsbury!
1 jar of nutella
a bag of Reese Pieces
and 1 bag of Mini Marshmellows
Excuse the really unflattering glare- I took this with my Iphone at the kitchen table. Pack the Croissants with nutella and marshmellows, I put about 4-5 in each. Roll them up and cook them for about 10 minutes! They're better when they're warm, but reheating them is just as good. 


Monday, July 23, 2012

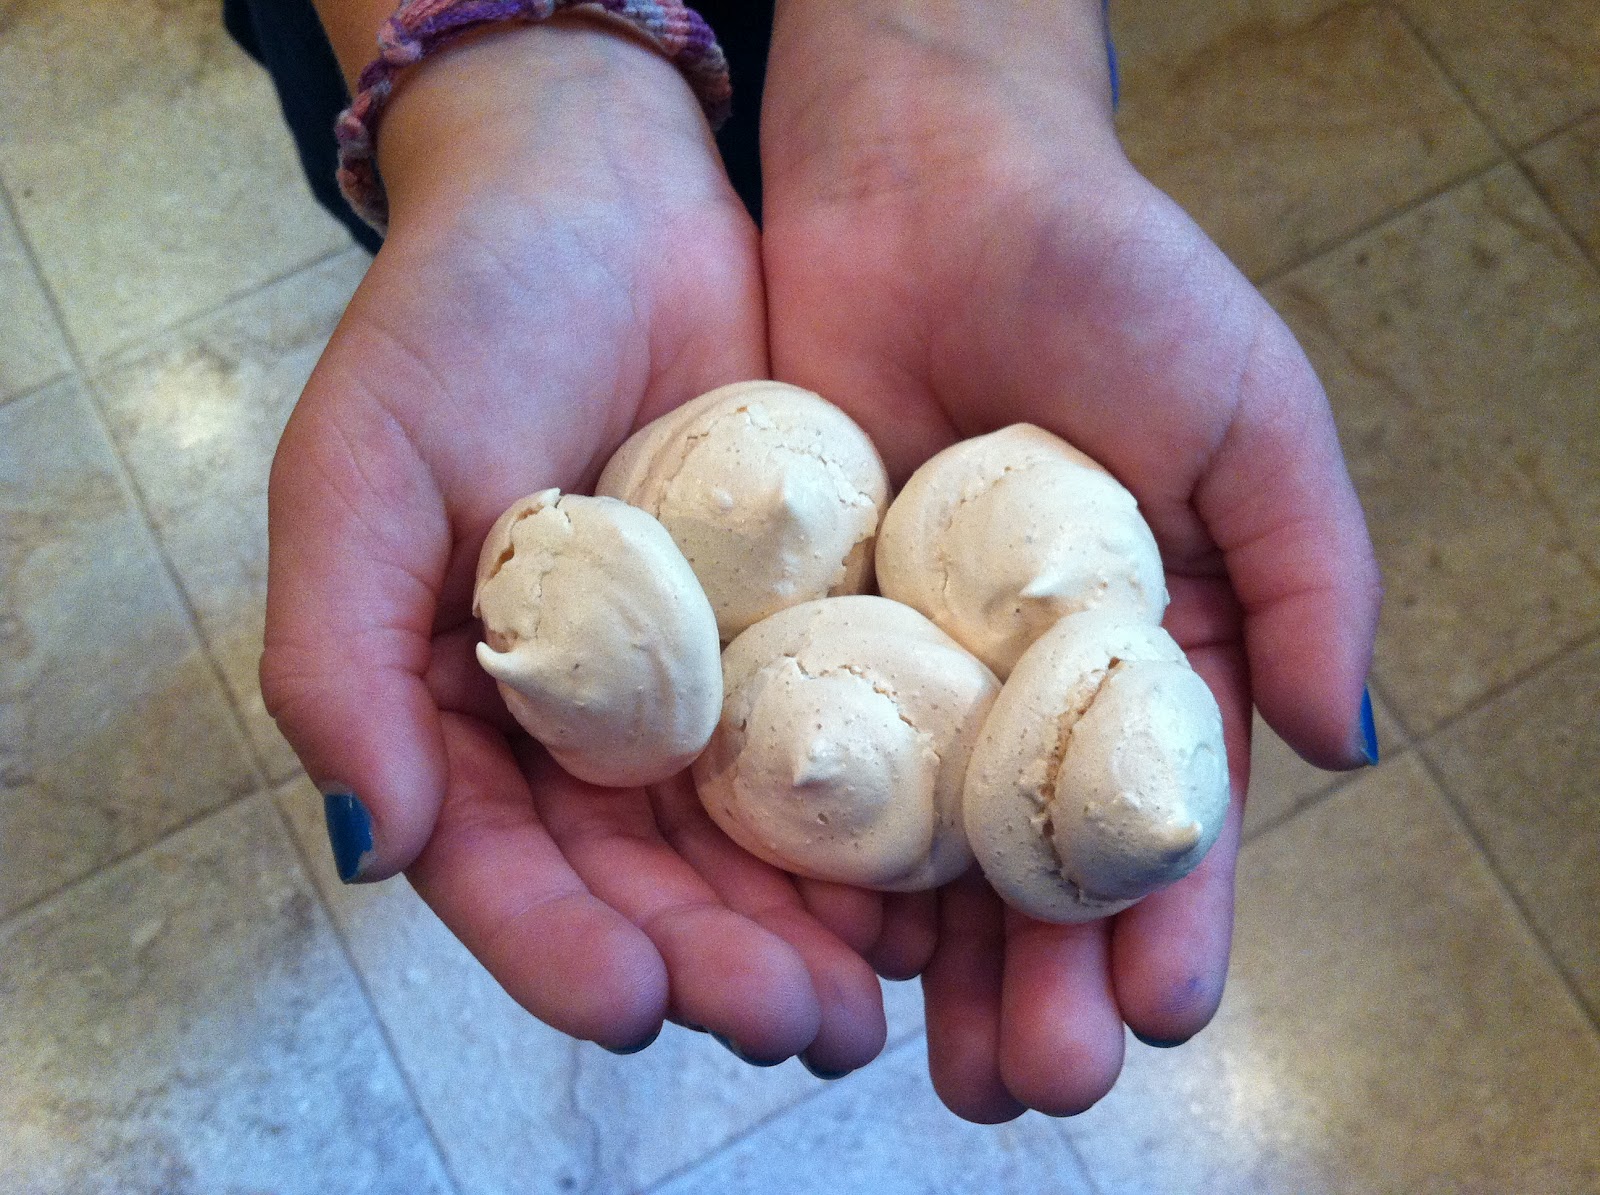
Cinnamon Bun Meringues


Small, bite-sized desserts win me over. Every. Time. I see an edible food made small, mini, and extra super cute, I want it- and by the hundreds. When deciding what to make for the blog (and my stomach) this week, I went to my gradually growing list of ideas. I felt ambitious and in the mood for something new.  Meringues. I've never even heard of meringue except on my moms favorite lemon meringue pie. Lots of people (aka my mom and boyfriend, Kris) told me how hard these are to make and what a pain in the behind they can be, but I was actually really amazed at how EASY they were.  The hardest part was holding the electric mixer long enough before getting tired.

I was originally going to make regular meringues with a raspberry sauce, upon Kris's request, but saw the Duncan Hines Frosting Creations and came up with a different combination. Cinnamon Bun topped with cream cheese icing.


Excuse the ugly placement of icing. These went super fast in my house so we kept them out on the counter with the jar of icing and a knife and everyone placed their own icing.  Although- I do suggest warming it up so it's drippy and drizzling it over the top of each with a spoon or icing bag.

These are so super easy, but they do take a lot of prep time and baking time, so be prepared.


Here's the recipe for "simple meringues" that I used. I assume it's a universal recipe.  Plus my modifications to the directions.

Simple Meringues

-2 egg whites
-pinch of cream of tarter
-1/2 cup super fine sugar (I used regular granulated sugar and it seemed to work just as well)
-optional: packet of Duncan Hines Cinnamon Bun icing creations

Directions:
1.    Preheat oven to 170 degrees. Line two cookie sheets with parchment paper or aluminum foil. Prepare a piping bag with desired tip.  I used the star, but it seemed to have been a little watery to hold the shape.
2.    Put egg whites in a bowl and beat with an electric mixer on medium until frothy.  Stop the mixer and add the cream of tarter. I used 1/8 teaspoon to be exact.

3.    Continue to beat mixture until soft peaks form. The batter should be thick enough to hold a peak, but it droops over in seconds.
4.    When the batter reaches soft peaks, speed up the mixer to high and gradually add sugar.  This process should take you about 7-9 minutes depending if you used superfine or granulated sugar. Pouring the sugar should take you the enter 7 minutes. I mixed the flavor packet in with the sugar and scooped it in a tablespoon at a time.

5.    Once the batter is shiny and holds peaks, it is ready to be placed into a piping bag. Make sure all sugar is devolved and that the batter doesn't feel grainy. Spoon the mixture into the piping bag, and begin piping small mounds onto the cookie sheets. They should be no taller than an inch high


6.    Bake for 90 minutes in the oven. When the meringues are done, turn the oven off and let them sit for a few hours or over night. I took mine out an extent them sit on my table to cool COMPLETELY...except for the few we ate straight out of the oven. 
After cooled, heat up cream cheese icing in the microwave and drizzle over meringues. Let dry completely and store in an air tight container for a few days.

Thursday, July 12, 2012

Reinventing the Candy Bar: Almond Joy

Ever since I was old enough to know how much Christmas Shopping my Mom ACTUALLY does, we've made it our little tradition to wake up super early on Black Friday and head out for a full day worth of sale shopping. We shop, chat, strategize, and eat. We usually get coffee and hot chocolate in the morning and eat a big lunch during the day, and snack here and there while we're out. My mom and I have very similar likes when it comes to chocolate-y snacks. Raspberry-filled, chocolate covered, nutty, caramel, something or other shoved into a candy bar has our name alllllll over it. So when I decided to start the "Reinventing the Candy Bar" series, (in which the candy bar itself is used in a recipe, or the inner ingredients are used separately), I immediately thought of my mom's favorite, Almond Joy.

Coconut, almonds and chocolate wrapped in one delicious bar. How irresistible?!? I decided to wedge all of this in between pretzels.  YES. PRETZELS. There isn't really a set recipe of exact measurements for this, it just depends on personal taste. I like more coconut, so ya know what? I added more coconut.
Waffle pretzels all lined up- courtesy of Maddie!

Melted 2 Large bars of Hershey's Dark Chocolate over the stove and added coconut and chopped almonds. (heavy on the coconut, this made about 40 bites)

Scooped it onto a pretzel and placed another pretzel on top. Threw these babies in the fridge for half an hour so the chocolate could set and....

Serious Heaven. 

I left for my boyfriends house an hour away for the night, and by the time I got home the next day, half the tray was gone. Here's just a quick little overview of how to make Almond Joy Pretzel Bites

Ingredients: 
1 Bag of Waffle Pretzels
2 Large Hershey Bars- Milk or Dark Chocolate
Shredded Coconut
Chopped Almonds

Directions: 
1. Melt chocolate bars over the stove until completely melted. 
2. Add coconut and almonds to the melted chocolate. As much or as little of each as you prefer. 
3. Scoop by the teaspoon onto waffle pretzels and sandwich it together with a second pretzel. 
4. Refrigerate to harden center. 
 5. ENJOY!!

Friday, July 6, 2012

Peppermint Patties

Recently, I've been completely obsessed with the iPhone app FoodGawker. My boyfriend scrolls through it on my phone, "favoriting" the recipes of actual food that contain any manly ingredients such as steak, bacon, and hot sauce. Me on the other hand, scroll through the app adding things to bake to my favorites list. This is the first of many posts of experimental FoodGawker recipes. Might I add it was a complete success! ...Especially because it's mint. and chocolate. Sold.

Mixing the ingredients was a little give or take. The recipe calls for a certain amount of ingredients for the filling, but you end up adding more or less, depending on how it ends up mixing. I added a little extra water, and the inside was perfect! You should be able to roll it into one big ball and wrap it in wax paper for freezing. I used about 6-8 drops of peppermint oil I found at my Chef Central to flavor it.
I found it alot easier to roll the dough into balls and flatten them with my hands as opposed to rolling the dough out with a rolling pin and cutting them. Although they did not come out in perfect circles, they still tasted just as good. 
After freezing and dipping, I could NOT WAIT to try one of these babies out. I will never, EVER taste a York Peppermint Pattie the same again. These are so beyond good, especially frozen or cold. The batch amount only made 2 dozen of them for me (sand dollar size). Excuse the dipping job. These are kind of hard to dip without the bleed of chocolate onto the wax paper. Whatever. More chocolate :)
Thank you Cookie-Talk for this amazing recipe! These are definitely a great summer snack when frozen and perfect to melt in a cup of hot chocolate in the winter. Super Delicious!

Peppermint Patties
  • 2 1/4 cups powdered sugar
  • 1 1/2 TB light corn syrup
  • 1 1/2 TB water, plus more for spritzing if needed
  • 1/2 tsp pure peppermint extract
  • 1 TB shortening (preferably organic!)
  • confectioner’s sugar, for kneading and rolling – I used about 2 TB
  • 13 ounces 70%-cacao bittersweet chocolate, coarsely chopped

1. Mix together the powdered sugar, corn syrup, water, peppermint extract, and shortening in a mixer. It will take a while to come together and will still only be crumbly. If it is very dry where you are, spritz lightly with a little extra water. Once you start seeing large pieces come together, it is ready. You should be able to form a ball and hold its shape.
2. Knead dough with a sprinkle of powdered sugar and wrap in wax paper. Freeze for 15 minutes
3. This is when you roll the dough. Like I said, I preferred balling the dough and flattening it. You can also dust your workspace with powdered sugar, roll out like cookie dough, and use a cutter to cut the desired shape. 
4. Place back onto the tray and freeze for 4-6 hours or overnight. I was impatient and only froze them for about an hour, and they worked just as fine I assume. 
5. Dipping! This is pretty explanatory. Melt the chocolate and using a fork, cover the pattie in chocolate. Use a knife to scrape the pattie of the fork. After this, I refroze mine and kept them in a small bowl in the freezer, but if you visit the Cookie-Talk website, it says to let them set at room temperature. 

Cookie Dough Truffles


First of all, excuse the lack of my unprofessionalism here. I’m still getting used to this whole blog thing, so I’m hoping my first post isn’t terrible. I am part of a very huge, close family. Not only am I one of four children in my family, but most of my cousins are also one of four. My mom grew up with 3 bothers and 3 sisters, right smack in the middle of it all. My grandmother and grandfather still to this day, have parties and BBQ’s with all 7 kids, their spouses and 19 of us grandchildren. When I bake for my grandma’s gatherings, it means baking. A LOT.
Originally, for the 4th of July party, I was going to bake cupcakes and decorate them like snow cones, inspired by Bakerella. But as I scrolled through her AMAZING blog, I found these Cookie Dough Truffles.

I decided to whip a quick batch of these up for my boyfriend’s 21st birthday as a test run, and they were FLIPPING AMAZING and SO EASY! I brought a few extras home and they were gone in an hour. They are no bake and so quick, easy and ADORABLE. My first batch came out a bit better than the second, but I’ll still post pictures of mine anyway.

My cousin, Madison, usually helps bake and is all in when we ask if she wants to mix with her hands. She was dying to stick her fingers in the batter but this recipe called for an electric mixer. This was after mixing, we used a rubber spatula to fold in the chocolate chips.

This time, the batter was mixed a little TOO well and I had to actually freeze the dough chunks before rolling them into balls and freezing them again for dipping.

 While the dough sat in the freezer, Maddie and I wrote on the sticks! USA!

Melted the chocolate! I find it’s a lot easier to melt the chocolate over low heat on the stove and add a little vegetable oil to thin out the chocolate. 


Dipped and sprinkled by Maddie.  She is also usually the elected sprinkler girl.


July 5th, phone calls and facebook messages were non-stop all day telling me how good the pops were!  Heres the recipe from Bakerella. Thank you for your AMAZING recipe. This will definitely be made hundreds of times over! 

Chocolate Chip Cookie Dough Truffles
from The Cookie Dough Lover’s Cookbook
My modifications are in green!
1/2 cup (1 stick) unsalted butter, room temperature
1/4 cup granulated sugar
1/2 cup packed light brown sugar
2 tablespoons milk
1/2 teaspoon vanilla
1 1/4 cups all purpose flour
1/2 teaspoon salt
1/2 cup mini chocolate chips
chocolate candy coating
popsicle sticks, cut in half (use kitchen scissors to make a clean, smooth cut)

1. In a large bowl, beat butter and sugars with an electric mixer until light and fluffy (about 3 minutes)
2. Mix in milk and vanilla.
3. Add flour and salt and mix on low until combined.
4. Stir in chocolate chips.
5. Chill dough in refrigerator for about 30 minutes until firm enough to roll or scoop into 1-inch balls.
6. Place rolled balls on a wax paper lined baking sheet and place in the freezer for at least 15 minutes. (I had mine in for about an hour so longer is okay, too)
7. Melt candy coating following instructions on the package. Remove a couple of balls from the freezer at a time and insert the cut stick into the ball. Dip in candy coating and let any excess fall off back into the bowl. For this step, I used regular bagged Toll House chocolate chips and melted them over the stove in a pot. I added small amounts of vegetable oil to thin out the chocolate. I think this tastes a little better in the long run than candy coating. Before dipping the entire ball into the chocolate, I dipped the end of the stick in chocolate so that it stuck a little better.
8.Add small sprinkles on top and place on wax paper to set. If the chocolate pools at the bottom of the ball, dot the balls on the wax paper until most of it is pulled off the ball and then place it on a clean spot of the wax paper to set.
9. Refrigerate in an airtight container for up to a week.